| |
Game Center CX Season 8 – Back to Contents
#57
貼って貼られて「ビックリマンワールド」
Sticking the Stuck – "Bikkuriman World"
Chousen
"Bikkuriman World" was Hudson’s best lawsuit-free option to port Wonder Boy in Monster Land to the PC Engine, so that’s pretty much what this game is, with characters from the Bikkuriman franchise shoehorned into it.
Before Arino starts the game, the producer says they have a special guest! Cool! Even Arino’s excited; I wonder wh– oh, it’s Kensaku Sakai, the show’s planner. Apparently, Sakai’s a bit of a Bikkuriman nerd. See, part of why Bikkuriman is such a long-standing franchise is because of its collectible stickers — much like Cracker Jack prizes. As such, they fill a big collectors’ niche, and Sakai has a complete set of all the characters. He’s here to present Arino with this challenge’s gimmick: after Arino comes upon a boss or other main character in the game, he must attach their sticker to the board behind him. Knowledge in hand, Arino flips the switch and begins.

Arino enters the first door in Round 1 and acquires the Gladius sword from Super Zeus, the headlining figure of Bikkuriman. Hey, that’s one sticker down! A few minutes later, Arino reaches the first boss, Satan Maria, and defeats her with little stress. Sticker on!

In Round 2, Arino buys the Boots that make him run a little faster. Then it’s onto the miniboss, Super Devil. This guy’s a little bigger than Maria, and it throws Arino off at first — right into his first death. A Game Over forces him to start all over at Round 1. He gets all the way back to Super Devil, and this time latches onto the boss’ pattern, defeating him.

Arino continues through to the second half of Round 2, and the boss is Satan Maria again, but this time she’s tossing out mushroom enemies that Arino keeps tripping over. Luckily he defeats her in one go. In Round 3, Arino dies again, this time due to a Time Over. He figures there has to be some way to continue in this game, and after checking the manual, he proves himself right: just hold Left and push Start after dying. It works! The continue code harkens back to the Milon’s Secret Castle challenge, and since this is also a Hudson-published game, the method is the same. We can only hope Arino doesn’t bungle it and forget to use the code later on like he did before.

It’s good he learned it early, because the deaths start racking up in Round 3. Fate soon smiles upon him when he finds a hidden door in the wall leading to an armor shop. Arino buys the cheaper Light Armor, which absorbs 2 hits, and then pushes on. The next boss is Wonder Maria, who, despite being bigger, isn’t much of a pain. Arino defeats her on the first try, just as his life meter gets dangerously low.

Round 4 is sea-based, and Arino constantly misses a short jump. He can get back out of the water, but after a few tries he ends up dead again from a Time Over. After a few repeats of that, he makes it to the boss: Mashou Nero. Nero rains fireballs down on Arino, and he can’t quite escape them and make a hit at the same time. After five attempts, he doesn’t get anywhere.

Arino decides to save up some cash and buy new armor. This time, on the sixth attempt, he defeats Nero. In Round 5, Arino uses the Wing Boots to glide, which helps in avoiding the mobs of enemies he encounters in the cavernous level. He makes it outside to the desert, and with just a little bit of life left, he gets to the end… but there’s no boss, just a castle! Well then.

Round 6 is inside the castle, naturally, and right at the start are a bunch of single-block platforms to get across. After a few slip-ups, he makes it past the first section, and later finds another hidden shop. The Legendary Armor takes eight hits, so it better be worth it for all Arino spent on it. The next boss — Satan Maria again — attacks Arino not with magic, but with… a quiz? If he gets it wrong, he has to fight the boss, but he manages to answer correctly and defeat the boss instantly!

Arino begins Round 7 and enters the first door, only to find another Satan Maria boss encounter! It’s the same as the first boss, so Arino defeats her easily and gets the "Great Sword" as a reward. Round 7 is a bit confusing, with multiple doors that can warp him around the stages. Arino ends up fighting a second Maria, but this time he gets the Excalibur, which is even more powerful. Some more exploring of doors and he finds another Wonder Maria, the proper boss. He defeats her just as easily and moves on to Round 8.

In the middle of Round 8, Arino finds another hidden door, but it leads to a miniboss, another Nero demon. He defeats it and gets the Sword of Legend. Then at the end of the round is another Nero demon of the same kind, but this time Arino just pelts it with bombs and whirlwinds from afar until they run out.

Round 9 is a definite difficulty spike: Arino has to make his away across tiny platforms above lava, while destroying clones of the earlier bosses that are just floating around freely! He dies early and often here. After the fifth or so Game Over, Arino suddenly pulls back in pain. No, he– he couldn’t have…

Oh, you bet he did. He forgot the continue code. The Milon curse returns, and six hours of work are flushed down the drain! All Arino can do is toughen up and do it all… over… again. Four hours later, he clears Round 8 again. It’s way past dusk now — can he make it through before the cutoff?

Arino tries to be more careful in Round 9, but still ends up slipping and dying over and over again. But just before one death, he grabs the coveted Wing Boots! They’re pretty much all he needs to zoom right through the level and into the boss door. He dies on the first go, even after going berserk with attacks, but on the second try he makes it with just a heart and a half left!

Round 10 is mostly a breeze, even with its unforseen underwater sections. At the end is Jura Castle, and Arino enters it to find yet another Wonder Maria who’s faster and tougher than the last. That’s about all it is, though, and Arino defeats her on the first try. The final round awaits! Jura’s Castle is a twisting maze of forked paths and rooms with old boss characters coming back for another rematch. Arino dies a few times as he tries to traverse the labyrinth, but soon he finds himself in an electronic-looking section of the level. At the end is — yes! — the boss door, and behind it is Jura!

Jura loves to jump and shoot a burst of flame in midair, which is always catching Arino off-guard, and after misstep after misstep, he finally dies. He rushes back through the round and faces Jura again. Now Arino is more measured with his timing, backing away and then lunging in at the right moments to deal a few hits. Unfortunately, Jura gets Arino’s life down to near-zero, and then Arino accidentally stays under Jura, and the flame touches him to end another life. At this point, AD Tsuruoka finally comes in to offer his advice.

Tsuruoka says that hitting Jura from a distance using the Thunder and Fire magic seems to be the best bet here. Tsuruoka takes a seat and stocks up on the spells by defeating the minibosses that are all over the maze. When they’re tapped out, Arino takes the controls again to face Jura. As instructed, Arino zaps Jura with the magic, but it’s not long before he runs out of "ammo," and is left with only the sword. Amazingly, after the next open opportunity, Arino jumps in and hits Jura, dealing the final blow! Ah, yes, much applause and all th–
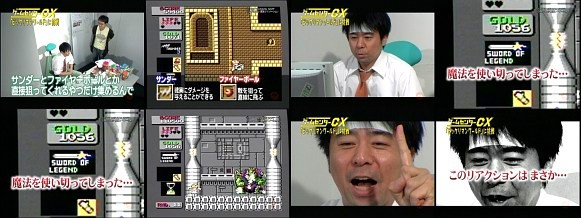
Uh-oh, Jura’s transformed into the true last boss! Arino quickly pauses the game and looks at the sticker roster to figure out who the heck it is. Of course, it’s Black Zeus. Arino unpauses and is quickly killed by Zeus’ near-rapid bursts of flame. Back through the maze we go…

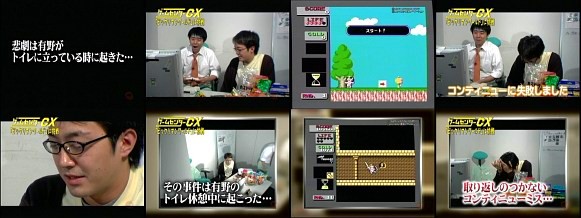
Arino has to leave for a toilet break, so Tsuruoka continues. After a fade, we see Arino return to the room. Tsuruoka’s not playing. Arino sits down and looks at the TV… and yells. It– no– he– he did. The producer confirms: Tsuruoka forgot the continue. He’s silent, his head is down; the poor guy is genuinely broken up. No! It’s not supposed to be like this!!!
The producer gives Arino the option of going for a second day, but with only two hours to beat the last boss if he does. Arino accepts. He’s taken this disaster with good humor, so he gives Tsuruoka a firm pat on the back and says thanks, and then jokes, "to be honest, I didn’t have the confidence!" Down but not out, the two men leave for the night.

Arino arrives the next day, finding Tsuruoka bowing in the corner. Unfortunately it’s a little late in the day, and the sun is beaming right into Arino’s eyes. This looks like a job for… AP Tojima! Tojima slides in holding a stick microphone (because there’s no more lapel mics) and Arino instantly cracks up — "what’s the matter, Action Reporter?!" Tojima’s here to do what he did to help during the Ninja Gaiden challenge: block out that nasty sun! But only this one time — once Arino dies, he’s going back to work.

With Tojima’s torso fighting the sun, Arino starts where he left off at the Jura battle. He lets loose with magic, but he has even less power than last time, so he runs out quickly. Before long he’s crushed and is killed again. Tojima politely excuses himself. Tsuruoka restarts the level and collects more magic power, then Arino again challenges Jura.

With one and half hearts left (and a few minutes of sword slashing later) he defeats Jura and prepares to fight Black Zeus. Arino carefully studies the boss’ pattern and jumps in and out regularly to deal his strikes. He eventually dies, but because of the timer, not the boss! The back-and-forth repeats. It’s almost been two hours, so this is Arino’s final chance.

With almost 50 Thunder bolts, Arino wastes Jura in record time. He unloads the remaining bolts on Black Zeus, keeping the evil mastermind at a distance. The Thunder runs out, followed by the Fireballs. Time to rely on the Sword of Legend once more. Much like before, he finds an open spot, leaps in and… kaboom! Arino’s elated, but not even a fourth as much as Tsuruoka is!
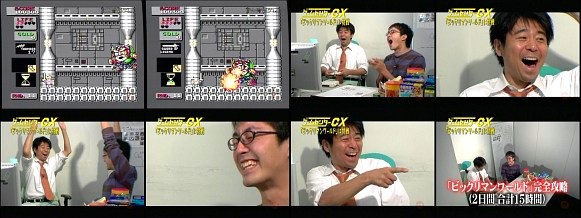
Too bad the ending’s so lame, though. Still, neither one has to carry the burden of the forgotten continue anymore… until the next Hudson game. Say it with me: Left – and – Start!

TamaGe
We join Arino in Sayamashi — a little ways northwest of Tokyo — to visit the Azuma Garden Leisure Center, a rather cold-looking indoor recreation center with all sorts of games (table and video), a batting center, and even a little fishing pool.

Arino starts with the video games. He seats himself on a Prop Cycle machine — he’s tried this one before, but back then it was all glitchy. This one looks a little beaten-up, but it works, and that includes the fan blowing air onto Arino’s head. Actually, it seems like the pedals aren’t working like he expected, so he ends up losing, perhaps unfairly.

He then sits down at a more ordinary game: the original Power Smash (Virtua Tennis). He gets a few impressive lobs in, getting up in the ranks, but a misstep ends his game. He sympathizes with his forlorn Jim Courier avatar. And then, for whatever reason, Arino spots a Ghosts ‘N Goblins machine and decides to play it. Then again, he just talked to the creator, Mr. Fujiwara for the latest issue of Continue, so why not? He plays far enough to reach the Red Arremer, and manages to defeat it on the first try!

Arino exits the video game room and enters the "Auto Tennis" hall: a series of pitching machines behind pictures of tennis courts. Hilariously, Arino misses almost every shot that comes at him. Eventually, he calls over AD Tsuruoka for some doubles help. It’s not that big of an improvement.

After a short visit to the prize catchers, Arino pays for 30 minutes at the fishing pool. He sits down at the edge, breaks off a bit of bait and waits for a bite. Five, ten minutes and nothing’s happening. He pulls out his line to find that the bait’s disappeared! Dang. Just then, cameraman Abe leans in and suggests Arino add a larger amount of bait to the end. Arino gets a bigger clump and molds it into the shape of a fish, then tosses the line back in.

He gets a bite! Arino fights with the line and Tsuruoka rushes in with a net to catch the bugger. It’s a lunker, too (well, proportional with the size of this place). A nice little capper on a not-too-bad day.

Moshi-Moshi Daisakusen
Arino continues where he left off: Stage 2. This stage is made up of blocks shaped into musical notes, with a bed of gold at the bottom. But none of the blocks can be vaporized here, so Arino’s really going to have to figure out the safest way to get through this.

Arino starts by getting a few piles of gold on the bottom, then going up and dropping down again to get the rest, but the ends up surprised by two robots, who he then runs into. Right about then is when he’s handed his first postcards — two of them! — with numbers to call. He goes with "Ryoko-san," who writes that she can help with at least the first four levels. Arino calls "Ryoko" and she suggests luring all of the robots single-file, then dropping down to get the gold.

Arino does just that, leading them Pied Piper-style along the shimmy bar, until he drops down and starts swimming in cash. It mostly works, but the robots are still in posession of one pile! He chills out in a corner, then pauses and looks around the stage — the gold’s been dropped again! Arino attempts to grab it, and he does… but another robot is on the opposite side, and he’s pinched.

He tries again, and repeats the process over and over until every last bit of gold is grabbed, and then makes a victory run for the final piles at the top, which instantly clears the level.

|

 The Game Center CX Episode Guide